|
5 watt guitar Tube Amplifier |
|
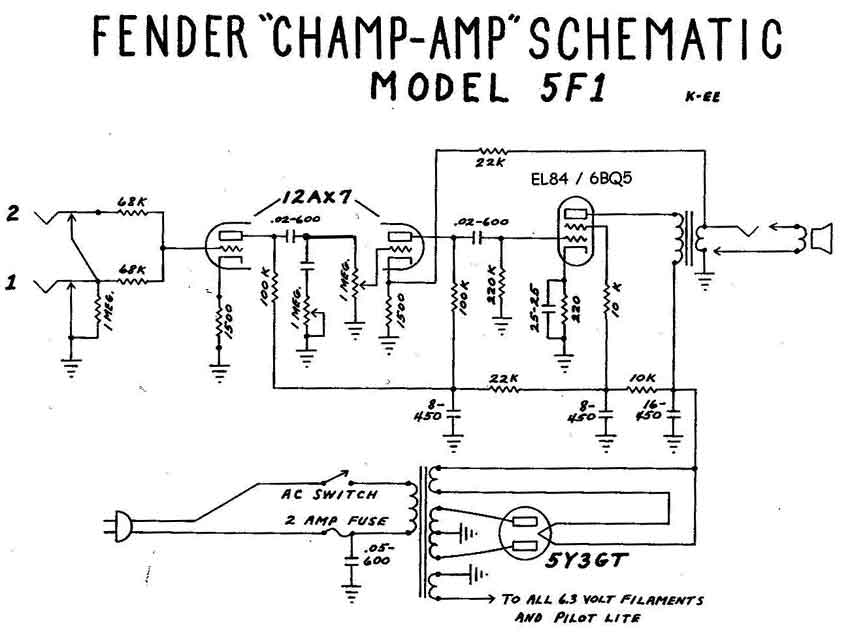
It started when I found some old tubes and an output transformer in a drawer in my bacement, I had for some time played a bit through an old stereo tube amps made Made from the amplifier part of a B & O "Belkanto" tape recorder around 1960-62. The amplifier was purchased a few years ago at a flea market. It gave me, even with some hum, a taste of how clean Tube amplifying the guitars could sound. I began looking for building instructions for small guitar tube amps, and soon I found out that there are many who work with amp building worldwide. The first who appeared was a Marshall 18 watt fitted with an EZ81 two EL84 and three ECC83. I have collected all the parts and components for that amp, but thought it was a bit too complicated for a first attempt. In the early fifties up to the first sixties different factories made a small 5 watt amplifier with an EZ81 an EL84 and ECC83 The schematic looked like it was an easy start amplifier. |
|
|
|
Fender made this little amplifier with a 10 "speaker, and developed it through the years with both the tremolo and reverb, and 3-way tone control. |
|
|
|
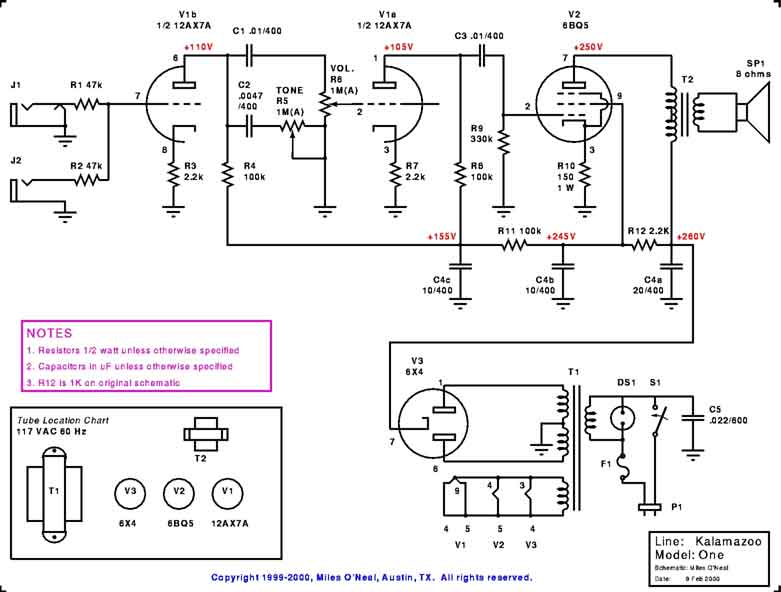
After a little searching on the net I found this schematic from Kalamazoo, and it looks like an easy start.
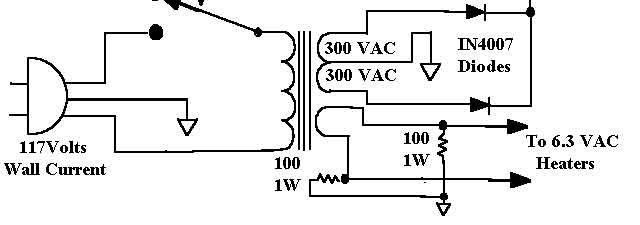
I did not have the tube EL84 and ECC83 at the time, but there was a some EL82 and ECC82, so I would try using them instead of the described. I had got a transformer with a 6.3 volt winding and a 300 volt winding so I could not use the EZ81 retriefer tube but had instead using a full-wave rectifier circuit.
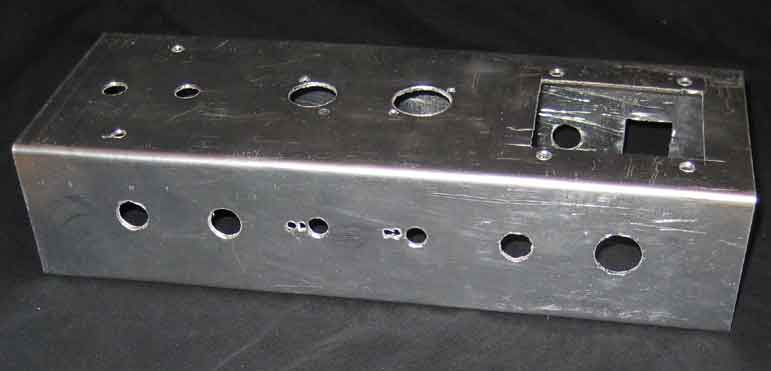
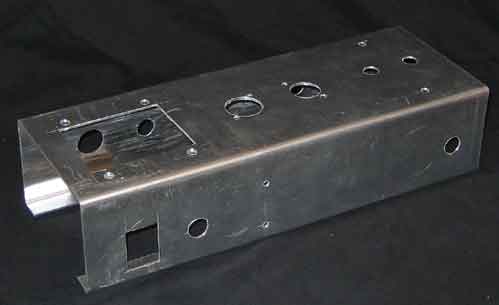
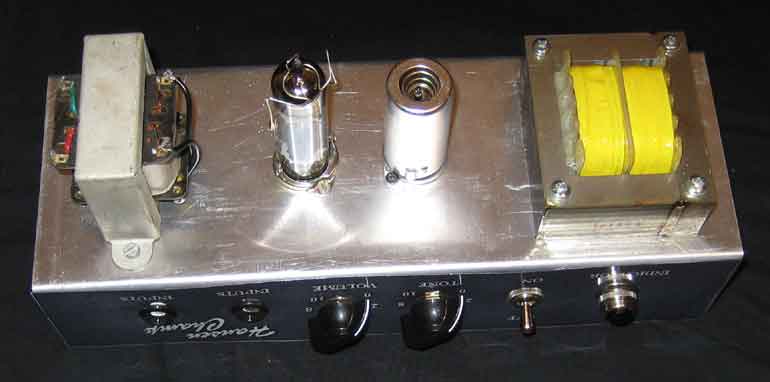
So I began to lay tube sokets, transformers and connectors at a 1.5 mm aluminum plate, bend, drill and saws a chassis. |
|
|
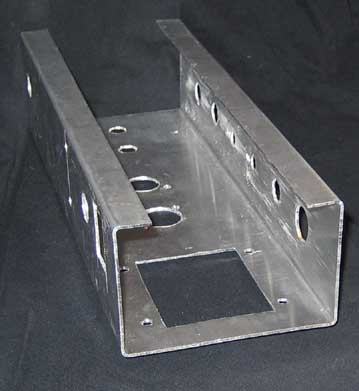
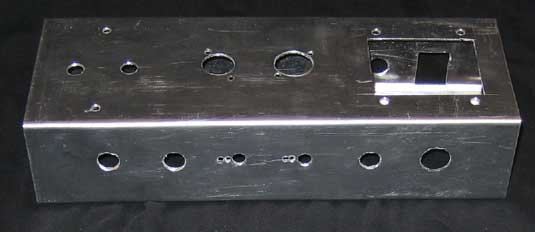
| Holes and squares were drilled, sawn, filleted and milled so they matched the dimensions of the US inch. The plate was folded in a closed U-profile. |
|
|
|
So I was ready to begin assembly, tube sockets, transformers, connectors and potentiometers.
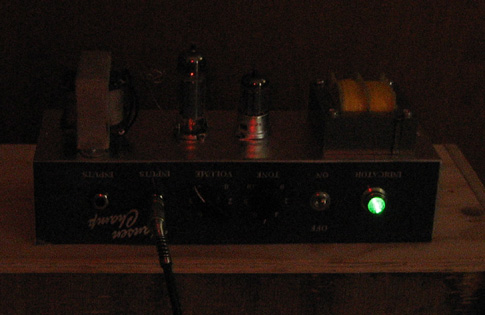
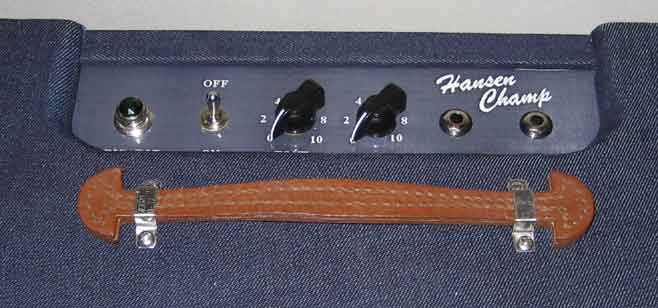
The front plate is made of a thin clear plate of PVC and the text is written in characters using AutoCad program and subsequently reversed and converted to negative and printed on a transparent adhesive film from Avery. After affixing the plate is painted white on the back so the letters appear white. |
|
|
| Mains plug from a power supply in an old external CD burner that can be used a 3-wired cable so there is possibility to connect the ground. |
|
|
|
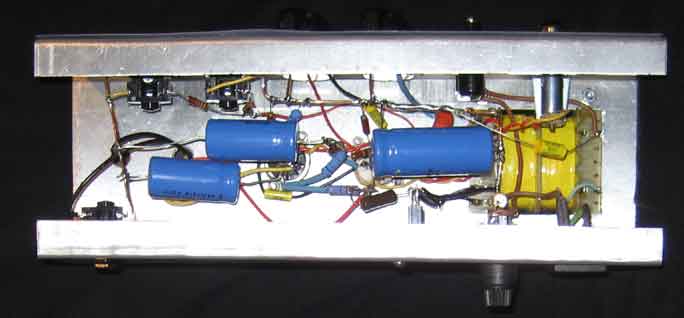
The components were soldered directly onto the tube sockets to have a short distance electrical connections as possible, the wires to the filament voltage was carefully twisted and placed close to the chassis. Power was connected and there was life "but the noise" noise and hum so it was a pleasure, but there was a hole through! |
|
|
|
The first which turned out to be wrong was the voltage on the Tubes.
They were too
high, I measured almost 200 volts on preamp tube where the schematic
said 105 volts and approximately 300 volts at the output tube where
there should be 250 volts.
After some experimentation, I managed to hit 250 at the output tube by inserting a 15 ohms resistor in the electrical circuit just before the first elektrolyt capacitor, but voltage was still too high at the preamp tube around 165 volts. I discovered then that resistor 11 by mistake was a 2 watt 100 ohms resistance and, according to the schematic should be a 100 kOhm ½ watts, it helped, then fell all the voltage in place and amplifier played really well, still with the sixties known as 50 hertz hum. I have tried all the best advice, filament voltage was lifted off the chassis, shielded signal conductors were grounden but it did not help. I was just thinking that this would be so if I did not rectif the filament voltage. I had actually found a rectifier and found a website, where an amp builder would eliminate the hum that way. Then I fell over a project where a father would build a 5 watt amplifier for his son, he described the little tricks to eliminate hum. |
|
|
|
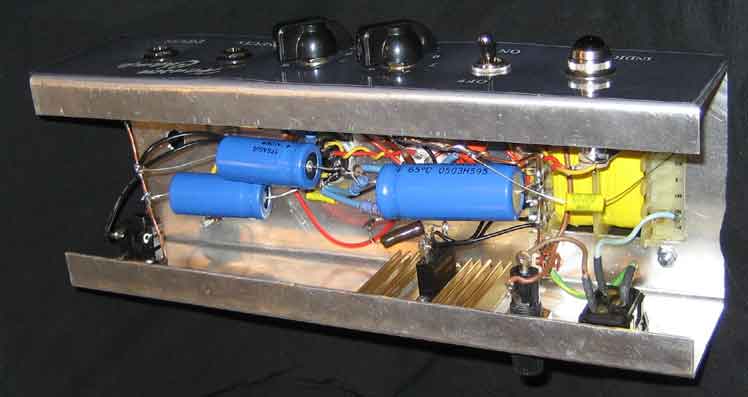
2 100 ohms 1 watt resistors from 6.3 volt transformer terminals directly to the ground. It removed all hum and noise from the amplifier, which now playing completely noise free even at full volumen. I've tried both the EL82 and EL84 in the output and ECC82 and ECC83 in the preamplifiers. The EL84 + ECC83 play higher but is also sharper than the sound of EL82 + ECC82 and a 5 watt amplifier plays high enough for home use. |
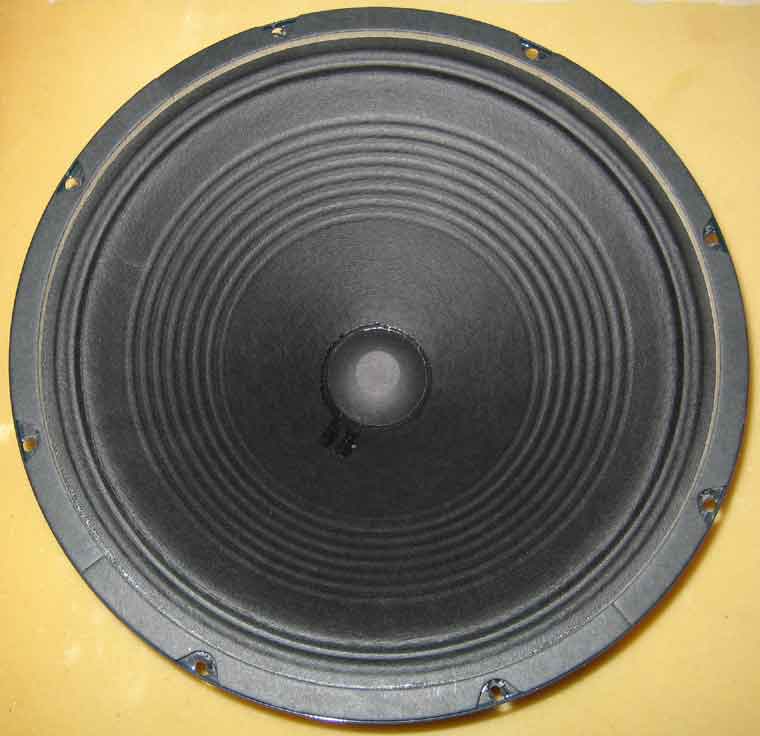 |
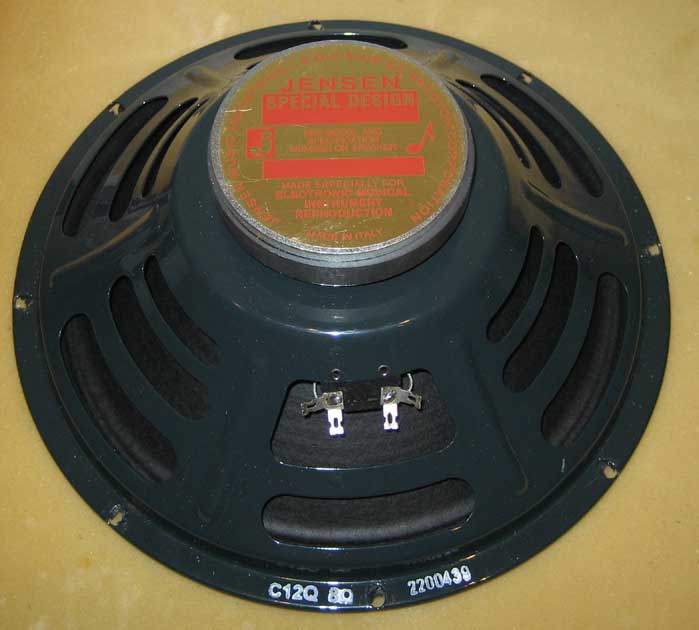
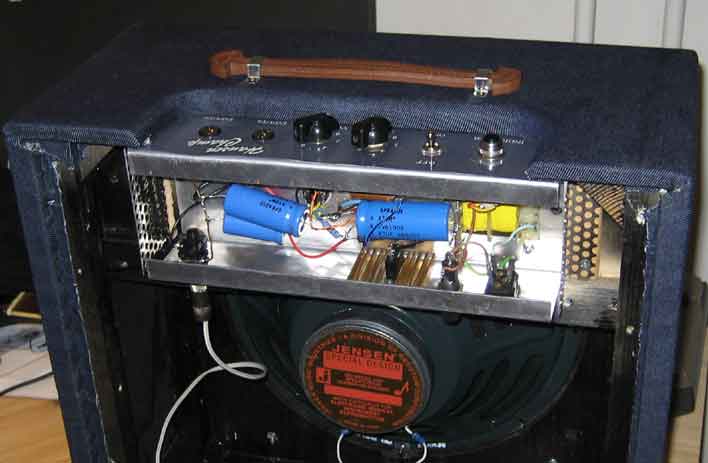
| It plays wonderfully warm, soft and completely clean up to 8 by volume, then it break up a bit. It plays through a 12 "Jensen speaker and it is a very fine amp. |
|
|
| It is very nostalgic to sit in the dark and look at the small tubes shine in the dark. |
|
I'm not a great guitarist but I have fun with it and I could find anyone to play with, I could maybe even have time to learn a little. I've recorded a little differently with a Fender Stratocaster Official American Fender'57 Reissue Stratocaster Pickups (Custom Shop). |
|
Sound clip 1 is recorded the Volume on 5 and the tone on 5. starting with the neck pickup trough the 5 positions ending with the bridge pickup.
|
| Sound clip 2 is recorded the Volume on
8 and the tone on 5 and the guitar in positions Mid and bridge pickup.
|
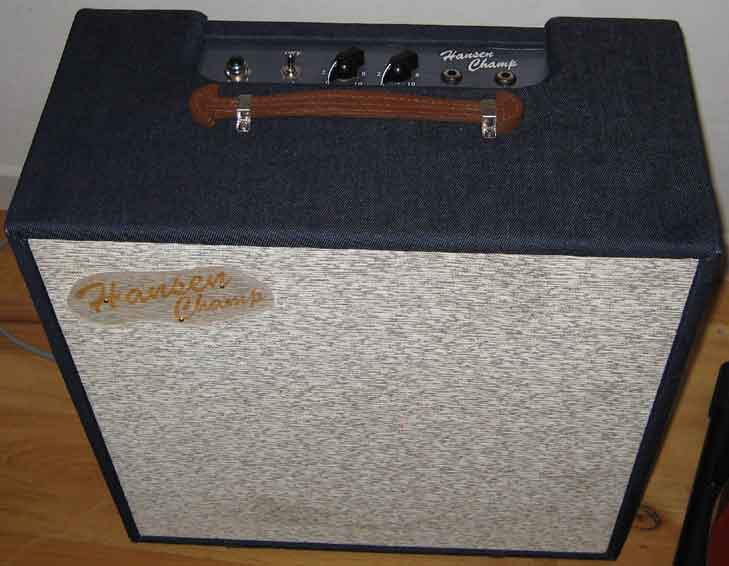
| Now to the cabinet. |
|
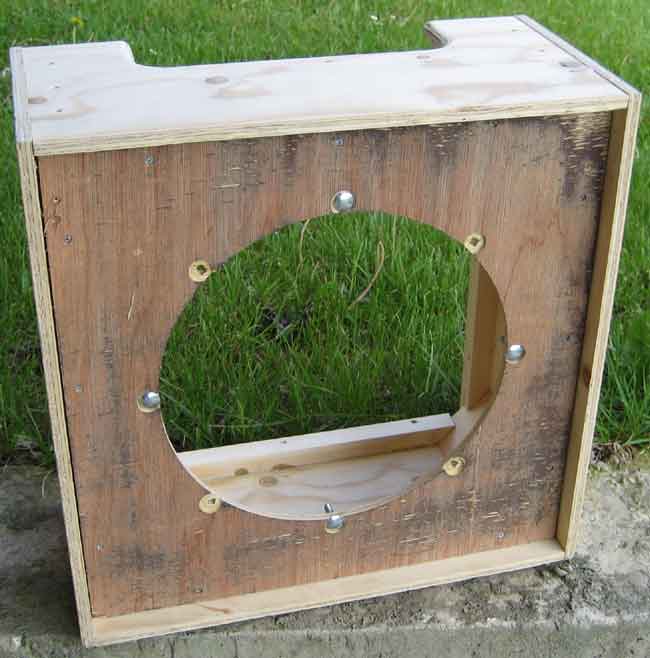
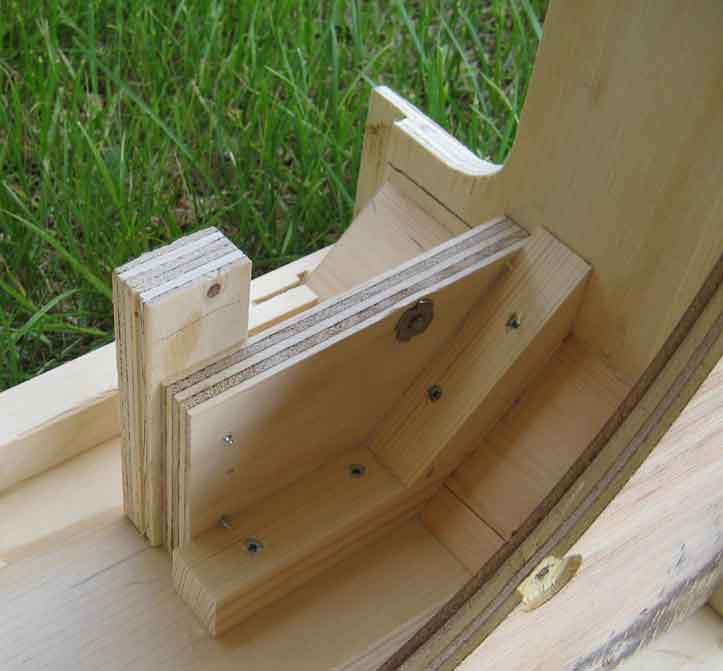
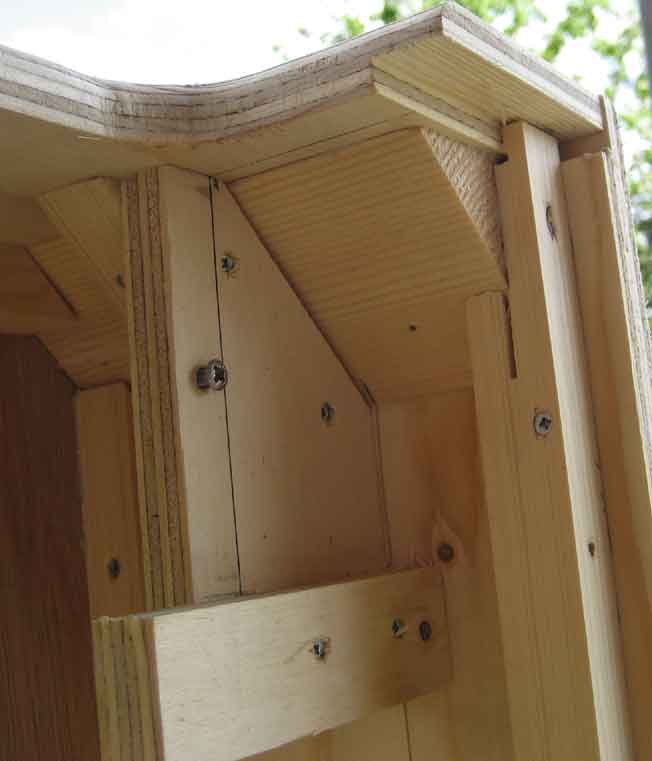
| The Cabinet is made of 19 mm plywood sheet which is folded and glued together at the corners. Corner joints are reinforced with glued and screwed oblique lists. |
 |
|
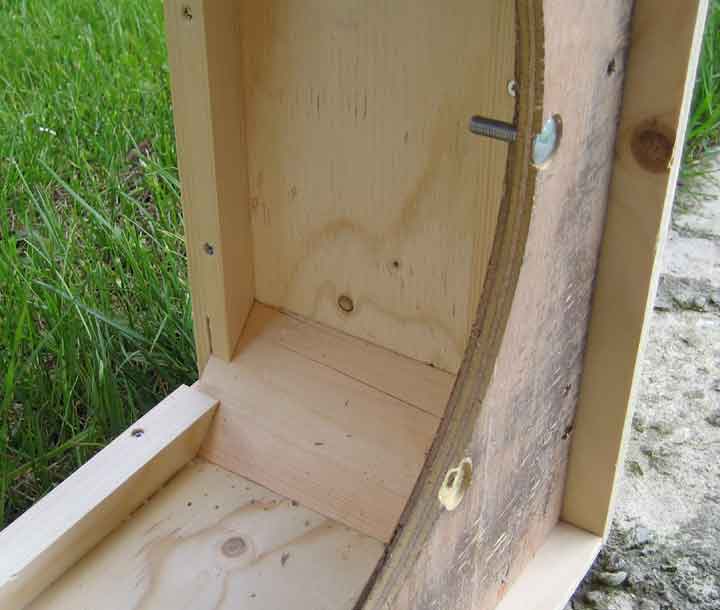
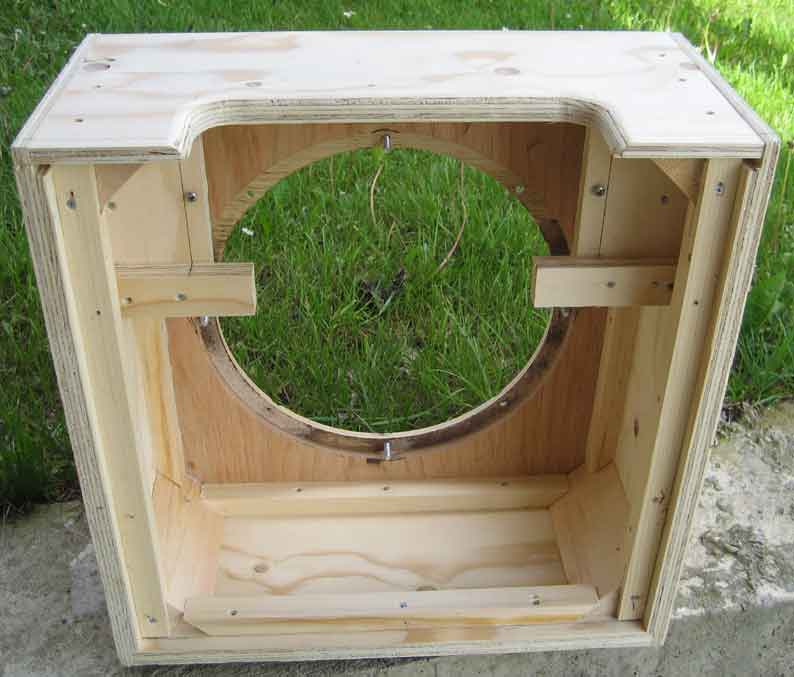
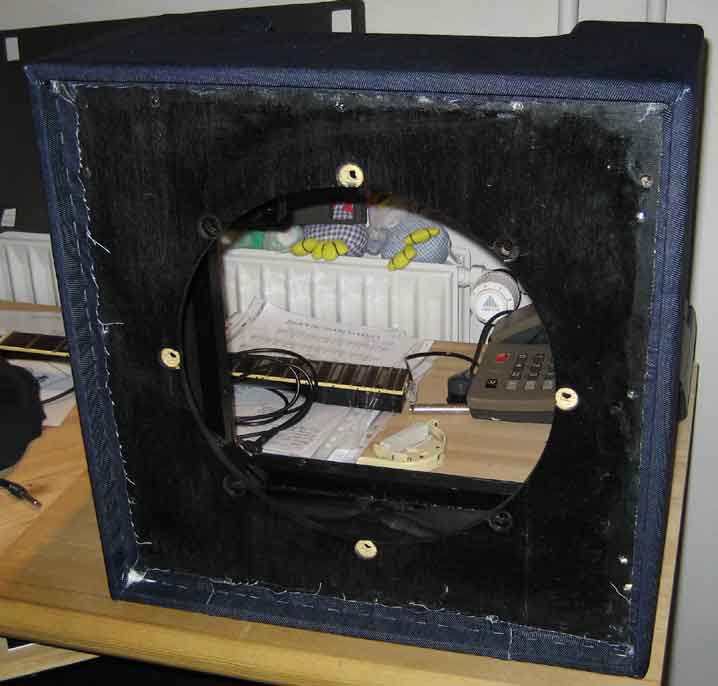
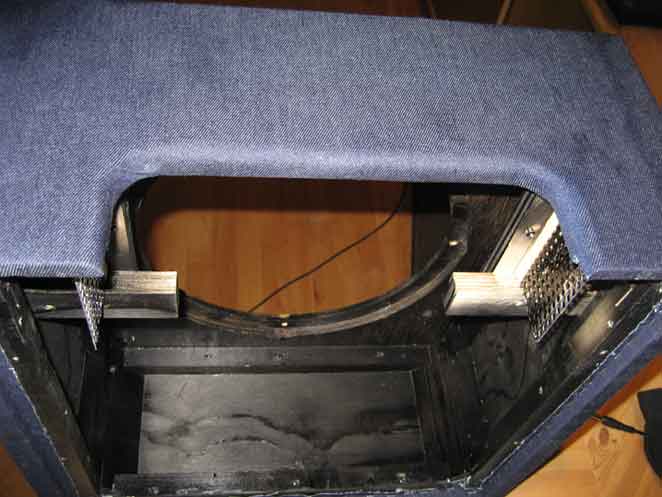
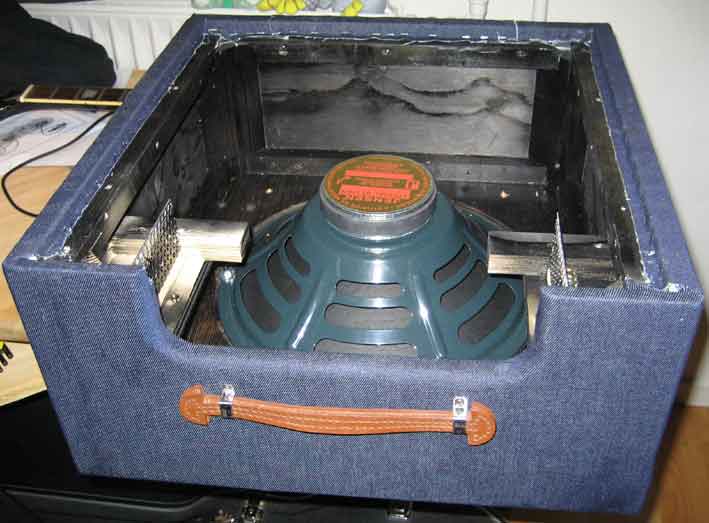
The Amp chassis is mounted in the cabinet in a screwed and glued transverse plate with a bear glued list using two 5 mm machine screws. The Front plate for the speaker is glued and screwed in mounted folding lists which is also glued and screwed to the cabinet sides. |
|
| There are also lists of folding fitted into the cabinet for mounting the cover plate of amplifier chassis and the protection plate for the speaker. |
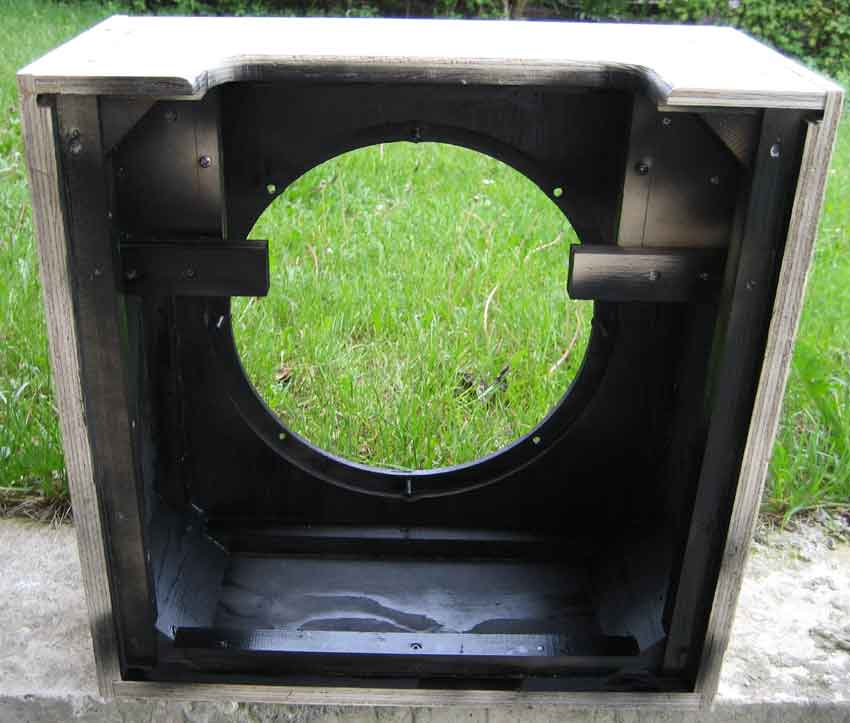 |
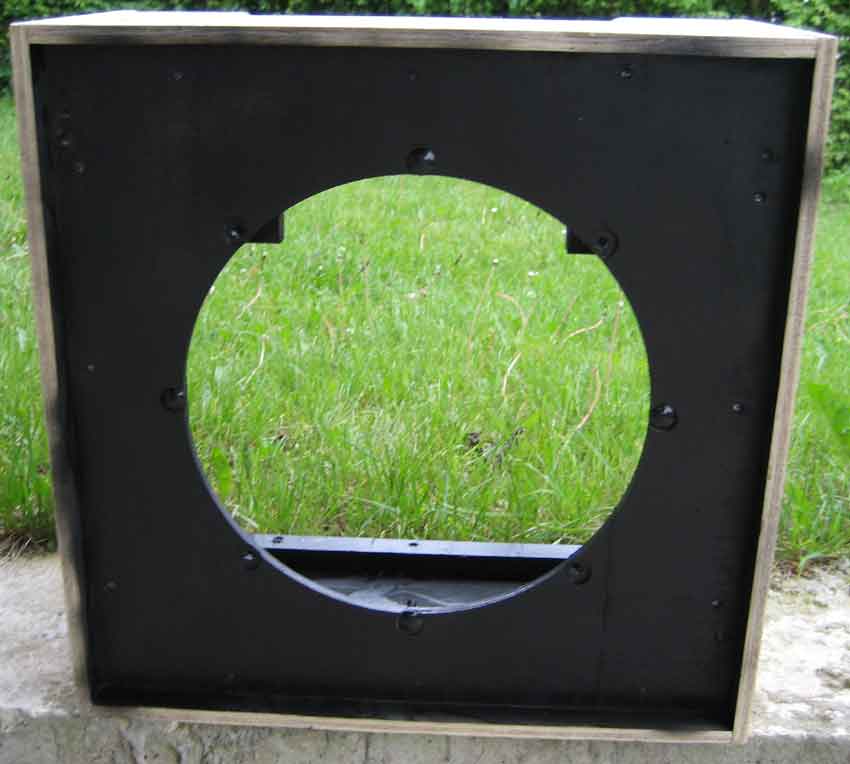
| Finally, the cabinet sprayed black to avoid the light shining through the wooden front. |

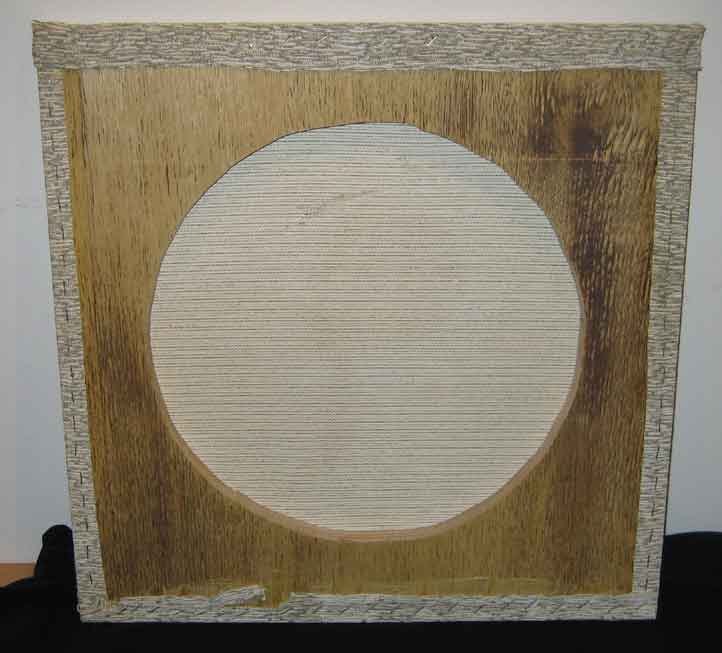 |
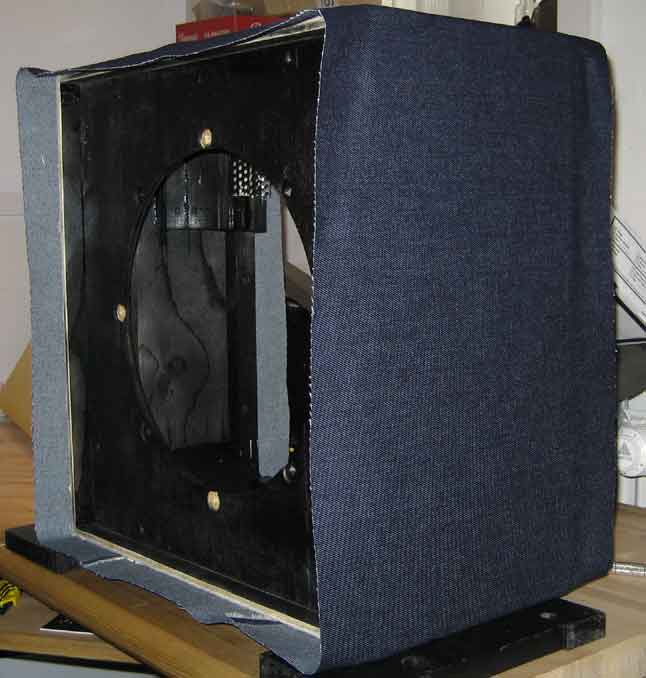
| The Front plate is covered with a piece of cloth from an old SEAS ceiling speaker. |


 |
| The Cabinet has been dressed with a piece Denim (normally used for jeans) glued on the cabinet and the edges are turned around. |
 |
| The substance is glued and nail with the brackets and pulled around the cutting to the amplifier. |
 |
| Carrying handles, rubber feet, speaker and amplifier are installed. |
 |
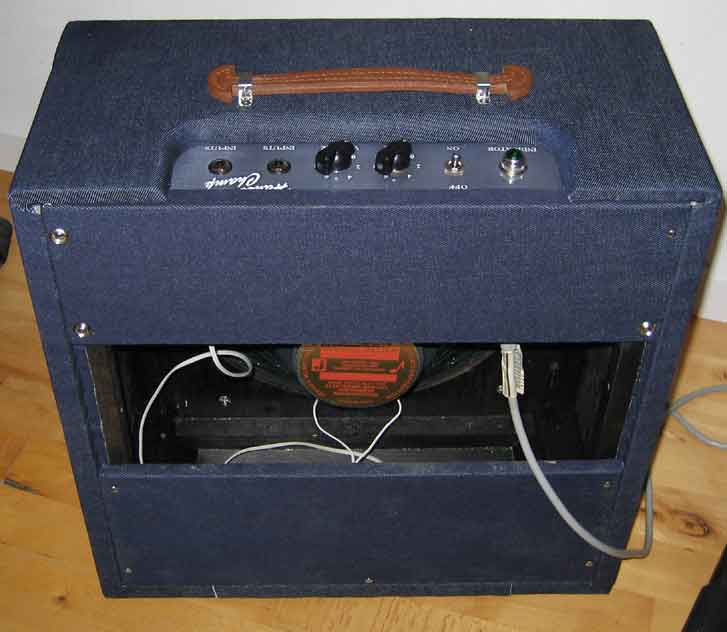
| Back plate and the wires are installed and the amplifier is complete. |
 |
|
The last pictures of the finished amplifier pictured with a TeleCaster guitar to give an impression of size. It has been an exciting process and I think that it is a pretty good product is finished, when it simultaneously sounds really good, it can hardly be better.
Sorry with the language I'm doing the best I can. |
| Back to the Amp site |